Showing posts with label desserts. Show all posts

Sunday, August 30, 2015

Almond-crisped peaches


Big's leaving tonight. He's off to spend a semester in Athens, Greece. And then back to college in the states. I will miss him oh-so much.

This time it'll be a long time before he comes back home. He's thinking of interning during the next summer break. So we are not sure when his next trip home will be. Perhaps I should brave the long flight and visit him in the states.. well, only if the exchange rate is favorable. ^^

Almond-crisped peaches (recipe adapted/from smittenkitchen)
10 peach halves (I used canned peaches)
100g almond meal
scant 1/2 tsp baking powder
60g sugar
6 tbsps rolled oats
90g cold butter, diced

1. Wash the syrup off the canned peaches, and dab dry with paper towels.

2. In a clean bowl, mix almond meal, baking powder, sugar and rolled oats together till well blended.

3. Whizz or cut the butter through the dry ingredients till it resembles breadcrumbs.

4. Place peach halves into a greased baking tray, and top with crumble mix.

5. Bake in a preheated oven of 200C for 30 minutes, or till tops turn golden brown. 

I just had to bake a peach-something for Big before he leaves. He loves peach desserts and I didn't manage to bake him any throughout the 3.5 months he was home. So on the excuse of his grandparents visit, I made a quick dessert just before I left for the all-important yellow rally.

And speaking of yesterday, I'm really happy to report it was a most peaceful rally of yellow. I'm seriously an unfit person. But I managed to brave and survived a crazy long walk under the hot sun and scorching heat (we parked crazy far away thinking the lrts were not going to work!). And what do I get? A whole night of migraine, dead legs, a knee in bandage.. and a clear heart.. and dare I say, perhaps hope for the future? ^^ I'll be honest, I'm sceptical that rallies will bring about changes overnight, if at all any. But yet I was there because I'm hopeful. This is home.

Anyways, back to this recipe, whether you call this a crisp or a crumble, they pretty much spell the same thing.. delicious! I know 'cos I left them at noon and came back to none ^^


Friday, April 24, 2015

Fabu-luscious mango float ^^


What dessert do you want, Baby pig?

Mango float.

Mango what????!!!

Go google, Kuku..

Mango Float (recipe adapted from justapinch)
~ fits an 8x13" container
200g graham crackers, crushed
300ml heavy cream
1 small can of condensed milk (add to own preferred sweetness)
1 tbsp rum, optional
some mango puree, optional
4 ripe mangoes, sliced thinly

1. Mix cream, condensed milk, rum and mango puree together.

2. Start 1st layer/base with crushed graham crackers, followed by a layer of cream mixture. Place sliced mangoes over cream mixture.

3. Repeat the steps above again. Makes 2-3 layers or more. End with a sprinkling of biscuits.

4. Chill thoroughly. Or place in the freezer, then leave to thaw in the chiller or fridge before serving.

Well, I know now, mango float or mango refrigerator cake is a popular filipino dessert. Not only is it delicious, it's super duper easy to make too! No wonder it's so popular! ^^

There's really no right or wrong ingredient measurements for this recipe, just use, add or reduce to taste. I had lots of crushed graham crackers left over as I wasn't sure how much to put per layer. but I certainly loaded on the mangoes! So so yums!

And in case you're living in a "no-graham crackers" country, use digestive biscuits. That was my plan. But while shopping yesterday at Jaya Grocer (my fav grocery shop! ^^), I found the filipino brand, M.Y San honey graham crackers (200g) at RM10.49.. sooooooo pricey, right! ^^|| Yet, I kiasu-ly bought 2 packs, sigh. Think I'll just stick to digestive biscuits next time.

Ok, in case you're wondering how it tastes like.. just think fabu-luscious, creamy, dreamy, soft mango ice cream! mmmmmmmmmmmmmmmmmm......................  ^^ ^^ ^^  

Saturday, November 8, 2014

S'mores pie


I blew RM85 on a blowtorch. Crazy? Definitely.

Why would I possibly need a blowtorch? Why, to make s'mores pie, you see. Not just any s'mores pie, but one that is toasted just right with a blowtorch. Crazy? Definitely.

A week back, we had dinner at A Pie Thing, and well, Baby pig fell for their s'mores pie. Of course, I had to open my mouth and say I could do it too, oops! So you know why. By the way, the savory pies, smore's and the apple crumble pie at A Pie Thing, are really good. Their "very popular" Elvis, sadly, didn't work for me. Well, 1 "so-so" out of 6 pies we had, ain't bad at all. You might want to check the place out if you're around Damansara Utama in the evenings. ^^  

S'mores pie (inspired by what we had at A Pie Thing)
1 baked shortcrust pastry, use your favorite recipe
Chocolate ganache, use your favorite recipe
Mini marshmallows

1. Fill baked shortcrust shell with chocolate ganache till almost full.

2. Leave to set in the fridge for at least 2 hours.

3. Place mini marshmallows over chilled chocolate filling. Toast marshmallows with blowtorch or broil in the oven till it's well charred, or caramelizes. Serve immediately.

3 lines of instructions? That's it? Yup. It's really that simple a pie. More so if you have leftovers ie. chocolate ganache, and shortcrust pastry in the freezer! Half the work all done.

1st attempt, too shy with the blowtorch ~ not charred enough ^^||

Just so you know, kids love this stuff! Ok, adults too ^^. I made this today upon Baby's request for his sleepover party. I need to say this, don't be put off by the charred bits.. they are the best part! In fact, my 1st attempt using the blowtorch, I was too light handed in charring the marshmallows, which didn't feel as toasty melty enough. I made sure they were charred properly in my next attempt, and the caramelized crunchy bits are incredible! This pie is simply aawesome because of the charred caramelized bits, melty soft marshmallow, ooey goey luscious to-die-for chocolate, and of course, the flaky buttery crust!

And to make the blowtorch investment count, Baby says I just need to make more s'mores pie. Duh. ^^


Thursday, October 16, 2014

I am fairly certain that given a cape and a nice tiara, I could save the world ^^


I didn't plan on decadence or indulgence.. or world peace.. but it happened.

It all started with leftovers. One lone egg. A tub of sour cream. Plus it's close to that time of the year, and I'm again researching cakes for a special someone's birthday. And I saw this recipe.. using sour cream, no butter (?!)! 

Seriously, I just wanted to make chocolate cake.

Chocolate cake (recipe by amanda rettke, found in delish.com)
40g cocoa powder (I forgot to half the recipe and used 80g instead ^^||)
105g cake flour
1/2 tsp baking soda
150g caster sugar (I used 115g)
pinch of salt
1 egg, lightly beaten
1/2 cup or 120ml sour cream
1 tsp vanilla extract
1/4 cup coffee
1/2 cup or 100g milk chocolate, finely chopped

1. Sift cocoa powder, cake flour and baking soda in a bowl. Add sugar and salt. Mix till well blended.

2. Mix in egg, sour cream, vanilla and coffee. Mix till well combined and fold in chopped chocolates.

3. Pour into a greased 8" square tin.

4. Bake in a preheated oven of 170C for 30 minutes, or till skewer comes out clean.

I usually never taste the batter, but I did this time. Oh my, it was so very, very chocolatey and not sweet at all.. and that's when I realized I may have forgotten to halve the quantity of cocoa powder! Uh-oh..

So..... I set out to sweeten the cake.. with what else? More leftovers, of course! ^^

Let's see, a banana on the counter, salted caramel and "vintage" peanut butter in the fridge. And that's how DECADENCE HAPPENED.

Salted caramel
use your favorite, or see here and here

Peanut butter buttercream frosting
some peanut butter (100g)
some butter (50g)
some icing sugar (40g)
some cream (add to the consistency you like ^^)

Sometimes I feel really clever when I'm able to make use of leftovers, la-la-la days like this! Big pig once gave me a pack of pretty serviettes (which he "lugged" all the way from the US ^^), that he thinks totally says me.. "I am fairly certain that given a cape and a nice tiara, I can save the world"! 


Yes, that's him saying I'm somewhat delusional, haha! ^^ Hey, if I wasn't a little looney, we'd just be having chocolate cake! Instead, we're feasting on a lusciously indulgent chocolate cake laced with salted caramel, peanut butter buttercream frosting and bananas! 

And in case you missed it.. chocolate cake with salted caramel, peanut butter buttercream frosting and bananas could just be the answer to world peace ^^


Wednesday, August 27, 2014

Petit caramel chocolate surprise ^^


What do you do with leftovers? And boy do I have LOTS of leftover everything from the last bake-out for Big's farewell party!!! 

Well, lucky for me, pook@dailydelicious posted her peanut butter chocolate cups.. and I knew what I could make with my leftover shortcrust dough, toasted almond slices, chocolate ganache filling and caramel filling! Petit caramel chocolate surprise cups, of course! ^^

And the "surprise" could be anything you want to put inside the filling, between the caramel and the chocolate topping.. could be some peanut butter jam, strawberry pieces, toasted nuts, anything that tickles your fancy. ^^ or you could just fill the tart shells with just chocolate and caramel.. but you should know, it does tastes really nicer if there's another layer of flavour in between ^^    

Petit caramel chocolate surprise cups (recipe inspired by daily delicious)

Leftover shortcrust pastry dough
Leftover caramel filling
Leftover chocolate filling
Peanut butter jam, strawberry pieces, or anything you like ^^
Leftover toasted almond slices

1. Put pastry dough into mini tart moulds. Bake at 180C for 15-18 minutes.

2. Place some caramel filling (do not overfill!) into tart shells, and bake for 15 minutes.

3. Remove from oven and place your "surprise" filling, and top with chocolate ganache, and toasted almond slices, if you have/like.

4. Chill for a bit before serving. ^^  

a choc+caramel cup.. the other, can you guess the "surprise" filling? ^^

I love how these petits turned out! Quite quite delicious! mmmmmmm.. ^^

Tuesday, August 26, 2014

Bon voyage, big!


My Big pig has left.


It's exactly 2 weeks today that he left for college far away in the States. I cried buckets when he left. And I cried every day for almost a week, before my tears finally dried up. I'm good now. And I'm happy he's all settled in nicely and liking the college he picked. And he's making new friends. What exciting times for him! ^^

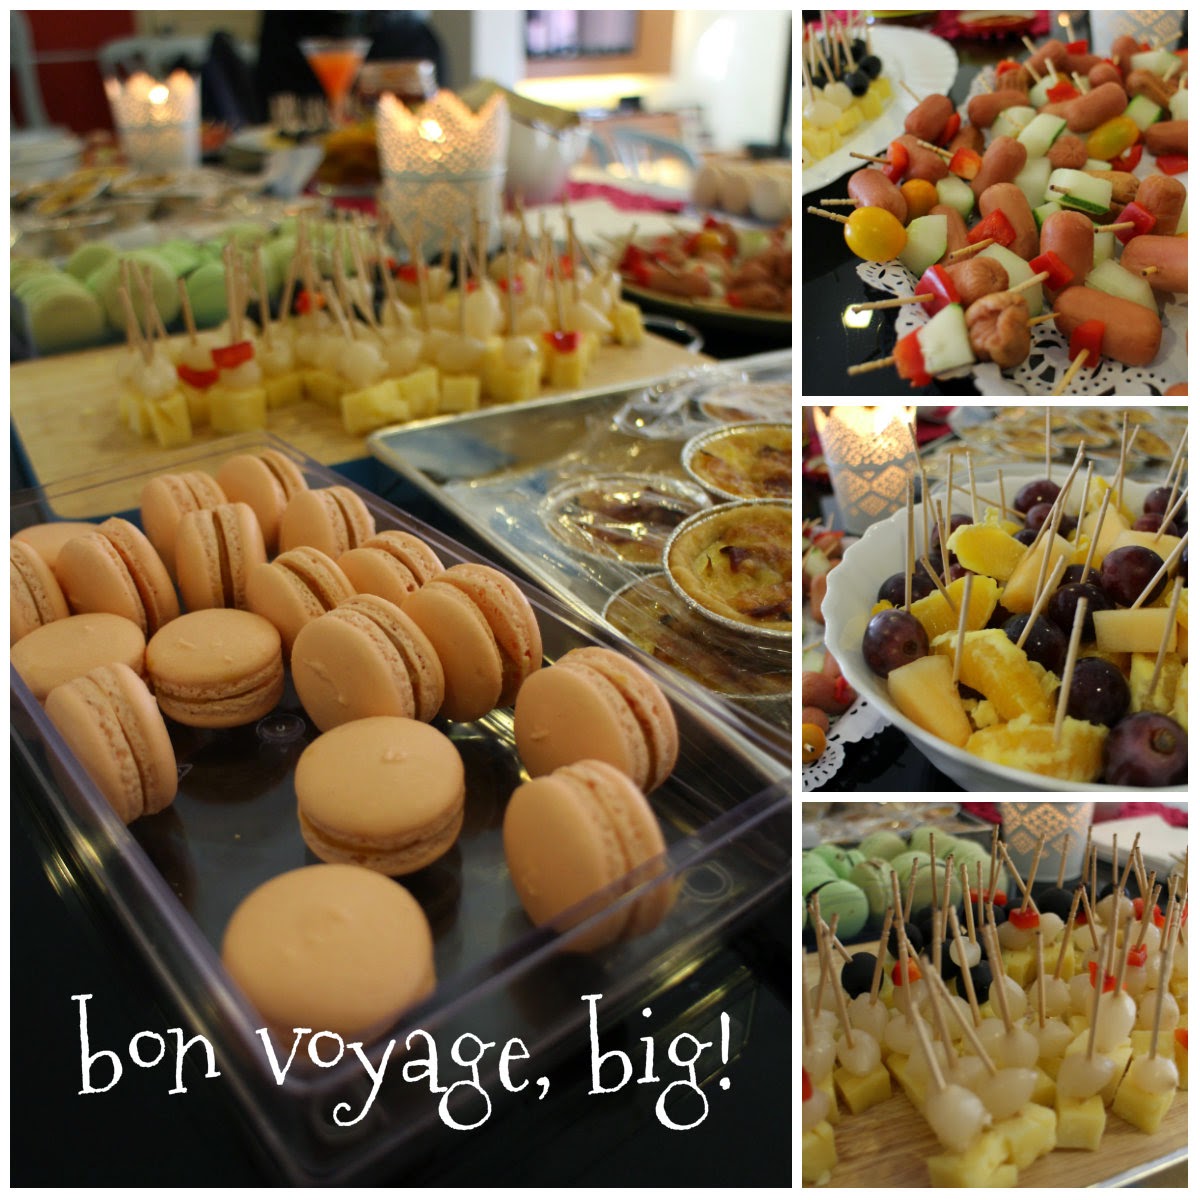
Anyways, before he left, we had a big farewell party for him. I can tell you, Big pig was a HAPPY boy! Great company, beautiful home/venue by the lake (generously hosted by his aunt Chet) and lots of yummylicious food! What more can a boy ask for, rite! And I think we outdid ourselves with the food! But I'm sure kicking myself for forgetting to charge my camera battery and not taking pics of the mains and desserts.

As always, I volunteered to do the desserts. I made red velvet cuppies, hokkaido chiffon cuppies, apple crumble, peach crumble, banoffee slabs and key lime squares. Big made brownies ^^. I also made mini caramelized onions bacon quiches, mini caramelized onions chicken quiches and of course, macarons, for appetizers, at Big and Baby's request. ^^

my 1st successful macs!

Yup, you heard right. Macarons. The dreaded macarons. Which I've not had any success and had given up on 2 years ago, after 3-4 failed attempts! That one! Aaaaaaaargh! But what to do, my piggies want it.. so I gave it another shot. And finally.. success, at last! But macarons are still "iffy" for me.. sometimes I get them right, but not always! Anyways, I'm soooooo DONE with macarons! No more! Not for a long, long time! ^^  

leftover not-so-nice-looking macs ^^

To my dearest Big, I'm the one who's blessed to have had you to love, and to have you love me back too. So, till you come back in 9 months time.. blinkers on, and kick ass in college! Love you sooooooo sooooooo much! ^^ 

Tuesday, July 15, 2014

Abso-licious apple pie!


My piggies' all time favorite treat ~ revisited! ^^

Can't believe it's been 2 years since I last made apple pie! Well, that's 'cos big and baby pig's mom makes the best apple pie.. so I steer clear of this bake. But since chubby pig is visiting and he doesn't get apple pie very much, I decided to make some for him. ^^

I've always wanted to make a latticed top crust, but I've never gotten it right ^^ll.. this time I used a ruler to make the strips after getting the idea from a baking show on tv. And success at last! Er, I know it's not exatly pretty and it's far from perfect, but at least, I'm half way there!  ^^

I used the same easy peasy apple pie recipe from martha stewart and smitten kitchen for the crust and used fuji apples for the filling because of its crunch. I don't care for green apples as I prefer a naturally sweetish pie which we usually eat as it is, sans vanilla ice cream most times! ^^


Well, there's nothing like having freshly baked, warm apple pie! Chubby was in seventh-heaven! He loves the flaky buttery crust and the gorgeous simple filling! ^^ "This is the best apple pie I've had!".. so chubby said. Er, well, he's not had that many to compare with, of course, haha! ^^

Now if the ultimate apple pie connoisseurs (big and baby), say it is.. then you'd better believe it! They have after all, been fed only the best apple pies! And they love this apple pie!


Poor fatty hubby.. there was none left for him. And boy, was he miffed. Sorry fatty, I'll make sure to make more next time! ^^


Monday, June 23, 2014

World's best cake ^^


Seriously? Can you hear "make me, make me, make me..!"? ^^ That's what I immediately wanted to do!

But after "rationally" thinking it over.. er, the sugar content was kind of a wake up call (!), I decided this cake needed the right occasion and person to justify making it! And it's my sweet lovin' chubby pig who gets to be my guinea pig this time round, hehe! He turns 12 today! ^^

World's best cake (recipe by sweet paul)
~ serves 8
10 1/2 tbsp (150g) butter, softened
1 2/3 cups granulated sugar (I reduced to 3/4 recipe ^^)
1 1/3 cup flour
1 tsp baking powder
5 large eggs, separated
1/3 cup whole milk (greedy me used  1/2 cup)
1/4 cup sliced almonds (a little more won't hurt)
1 cup heavy cream
1/2 vanilla bean or 1/ tsp vanilla extract

1. Preheat oven to 350F / 180C. Line an 8x12-inch baking tin with parchment paper. Since I did not have a baking tin of that size, I made do with a 7x10 inch tin and a medium loaf tin.. maybe using a 9x13 tin would be better?

2. Beat butter and 2/3 (or 1/2) cup sugar till light and creamy, about 3 minutes.

3. Add sifted flour and baking powder, and mix well on low speed.

4. Mix in the egg yolks and milk.

5. Place the batter into the baking tin/s.

6. In a clean bowl, beat egg whites (if using pasteurised egg whites, do add some lemon juice or cream of tartar!) and the remaining sugar (3/4 cup) to soft peaks. Spread on top of cake batter and sprinkle almond slices over.

7. Bake for 30 minutes. When the meringue is golden brown and puffed, remove from oven and leave to cool.

8. When the cake is cool, prepare to whip the cream with the scraped vanilla seeds (discard pod). Beat to soft peaks, about 3 minutes.

9. To assemble the cake, cut the cake into half crosswise with a serrated knife. Place one half of the cake on a serving tray and cover with whipped cream. Place the other half, meringue side up, on top of it.

10. Leave to cool in the fridge/chiller for at least 1 hour before serving.

Yeah, yeah.. the cake should be in 2 layers, I know ^^|| But for chubby, I decided that a layer is good enough. I'm quite afraid a 2 layer cake won't withstand the drive to chubby's. I'm only sending it later in the evening when I can bear to go out. I do hope he likes it! ^^

And no, I haven't had any yet.. the weather's so unbelievably hot! hot! hot!, I want my cakes properly chilled and cold!!! ^^||||| I will give my verdict and update once I've had some.. just look out for it right at the end of this post! ^^


Happy birthday, chubby! xoxo world's best kuku ^^ ^^ ^^


Updated 24th June 2014:
Ho ho! This is a delicious cake! World's best? Definitely one of the best ^^ it's like having really good yellow cake with light fluffy frosting ~ the combination of cake, fluffy meringue, light whipped cream and toasted almond slices is totally perfect in the mouth! Yums! ^^

The only gripe I have with this cake is the meringue ~ i dislike the eggy taste/smell.. however, it's totally unnoticeable when you eat it with the cake, whipped cream and toasted almonds! I should have persisted with my pasteurized egg whites that wouldn't whip! I now know it's not impossible to do it, just have to add some lemon juice or cream of tartar, and continue beating madly, haha!

Well, this cake befits its title. Certainly one of the best tasting ^^ Perfect eaten chilled on a hot day!


Friday, May 16, 2014

Chocolate cupcake with nutella swiss meringue buttercream ^^


This is a little surprise for my piggies. Mainly to celebrate Big pig finishing his AP exams.

My Big will be off to college in August.. and I'm still coming to terms with him leaving the coop so soon. He is, after all, my first love.. pure and unconditional.. and at first sight too. I'm a little sad.. a little.. Someone just told me not to cry when he leaves.. I will try my best. I have a pretty loose crying duct.

Moist chocolate cake (adapted from Agnes Chang, let's eat)
~ makes 12 cupcakes & a 6-inch round cake
220g sugar (it's perfect for me at 180g ^^) 
250ml milk
1 tsp instant coffee
250g unsalted butter
3 eggs
135g plain flour
60g cocoa powder
3/4 tsp baking powder
1/2 tsp baking soda
some nutella, optional

1. Place sugar, milk and instant coffee in a saucepan and heat till sugar has dissolved. Remove from heat. Add butter and stir till melted. Leave to cool.

2. Fold in eggs one at a time into the cooled milk mixture. Or use egg separation method for bouncy light cakes!

3. Sift flours and cocoa powder together and mix into the egg mixture.

4. Pour into cupcake liners and bake at 170C for 25 minutes. Or a greased cake tin for 40-45 minutes, or till skewer comes out clean.

5. When the cupcakes are cool, fill cake with nutella (place in piping bag with nozzle) by pushing the piping nozzle into the centre of the cake and pipe in filling.. this is optional ^^ Spread leftover nutella jam on cake if you like ^^


Nutella swiss meringue buttercream (adapted from the cakemerchant)
~ frosts 12 cupcakes
3 egg whites
75g sugar
227g unsalted butter
1 tsp vanilla extract
1/2 cup nutella

1. Put egg whites and sugar in a heat-proof bowl over a pan/pot of simmering water (without bottom of bowl touching the water). Whisk egg whites and sugar till sugar melts (rub mixture between fingers, if mixture is no longer grainy (smooth) to the touch, it's ready ^^). Remove from heat.

2. Whisk egg whites mixture till white, fluffy and glossy for about 10 minutes.

3. Add diced butter bit by bit into the mixture. If mixture curdles, just continue whisking till it all comes together again. It always does, just be patient ^^.

4. Add vanilla extract and nutella till well combined. Place in the fridge if buttercream is too soft, and beat for a bit if it's too stiff straight out from chilling.


These cupcakes are inspired by rima@bisouatoi ~ I saw her gorgeous chocolate cupcakes with nutella swiss meringue buttercream and a piece of ferrero rocher chocolate on facebook ~ and I knew these would be perfect for piggies! Never mind that all my piggies are not that big on chocolate desserts.. they are sure to fall for the ferrero rocher trick! Haha!

I haven't made anything fancy or frosting for some time.. I hope piggies will like this treat ^^


Saturday, May 3, 2014

Longan milk jelly ~ perfect wobble, smooth yet firm ^^


Yay! Finally! After almost 2 months of water rationing, it feels GREAT to get our lives back to normal again! ^^

It has been so hard to bake or cook during the past 2 months, with only a ONE-day window of opportunity of water supply, in between 3 days of no-water. Lucky (or unluckily, depending on how you see it) for us, our apartment tank water lasted almost 2 days. So we had no water only for a day. Of course, I've heard of some apartments' tank water lasting throughout the water-blackout, oh, lucky them! If only our apartment residents were more prudent and conscientious, it would have lasted longer I suppose!

You have no idea how much I wished everyone did all their chores, cooking and laundry on that ONE-day, and saved water for only the ALL-IMPORTANT bathing and toilet use for the rest of the "no-water" days. That would have made things so much better! If only everyone thought the same.. am I too extreme? Nawhhhhh... ^^

Longan milk jelly (adapted from mybaking)
~ makes a lot! ^^
3 tsp agar-agar powder
130-140g sugar
2 litres of water (1 can of longan syrup and top up with water)
10 pandan leaves (optional ~ I didn't ^^)
1 can of evaporated milk (400g)
1-2 cans of longan

1. Bring agar-agar powder, sugar and longan syrup+water to a boil.

2. Once boiled, add evaporated milk and again bring it to a boil. Remove from heat and leave to cool for about 8-10 minutes.

3. Strain/sieve mixture before use. Place a piece of longan into each mould and fill with mixture.

4. Chill thoroughly or at least 3-4 hours before serving. Serve immediately.


If you're looking for the perfect wobble, smoothest soft yet firm-enough jelly pudding ever, look no further!!! Mybaking has really nailed the perfect recipe! ^^ Though I'm not too certain about the high amount of sugar in her recipe ^^|| I reduced to more than half because of the addition of longan syrup, and it was more than sweet for us. Even without the longan syrup, I think halving the sugars (from 300g to 150g) is not a problem, unless you have a super-sweet tooth! ^^


Happy days ahead! ^^ ^^ ^^ ~~~~~~


I'm submitting this post to Little Thumbs up (May 2014: Milk) organised by Bake For Happy Kids, and My Little Favourite DIY, hosted by Tze of Awayofmind Bakery House 


Wednesday, March 26, 2014

Lusciously indulgent dark chocolate banoffee slab


It's been a while since I managed to bake or cook, with the crazy hot and dry spell we have here.. not to mention the ongoing water rationing that's driving me insane! ^^|| But the few splashes of rain (and thunderstorm) a few days back, has surely brought out the better side of me ^^ and I thought we could all do with some cheering up.

You know, it's been a terrible, terrible horrible, horrible March for me. I wonder if it's even possible to have so many bad, bad things happening every weekend since the beginning of this month??!! I've lost 2 friends (1 to depression and the other to illness), 239 people on a plane (I don't know anyone on it, but I feel down anyways ~ it's an aging thing, I think), and I've to deal with a crazy heartbreaking news too close to my heart.. It's been one long, never-ending bad dream.

I'm writing this not to gain sympathy, nor make anyone reading this sad or burdened, but it's so that I can look back one day, and say, "hey, this wasn't so bad.. this has passed, and I'm ok.. we're ok".

On a more positive note, I lost some weight. And I received an-all clear on a recent medical check-up. So that's good news. And of course I duly rewarded myself with a super-indulgent dessert.. dark chocolate banoffee slab! ^^

Dark chocolate banoffee slab (recipe by Dean Brettschneider, from his book, Pie)

Pastry ~ use your own personal favorite.. I used the below ^^

French pastry dough (by paule caillat)*
120g unsalted butter
4 tbsp water
scant 1 tbsp sugar
1/8 tsp salt
200g / 1 1/3 cups flour

1. Preheat oven to 210C.

2. In a medium oven-proof bowl (Pyrex), combine butter, oil, water, sugar and salt.. and place bowl in the oven for 15 - 20minutes, till butter is bubbling and starts to brown just around the edges.

3. When done, remove from oven (be careful of hot bowl and sputtering mixture!). Immediately dump flour in and stir quickly till it comes together and pulls away from the sides of the bowl.

4. Transfer dough to a 9-inch tart mould with a removable bottom, and spread it out with a spatula/spoon. No rolling needed, yay! ^^

5. When dough is cool enough, press to fit tart mould. Prick dough all over with a fork and bake tart at 200C for 15 minutes or till golden brown. Leave to cool before filling.

Filling
100g butter
1/2 cup golden syrup
395g can sweetened condensed milk
2 bananas, peeled and sliced lengthways

1. Place butter, golden syrup and sweetened condensed milk in a saucepan and cook over low-medium fire. Keep stirring until thick and golden brown. Remove from heat.

2. Pour over the tart crust, leaving about 7.5mm space from the top of the crust. There should be quite a bit of caramel leftover! Drizzle over ice-cream or drop them into banana cupccakes like I did ^^

3. Bake in a preheated oven of 180C for 15 minutes. Remove from oven and leave to cool slightly.

4. Place bananas over the caramel fudge.

Topping
225g dark chocolate, roughly chopped
50g butter
25-40g sliced almonds, toasted

1. Melt dark chocolate and butter in a heat-proof bowl over a saucepan/pot of simmering water, not letting the bowl touch the water. Once chocolate has melted, stir till smooth and remove from heat.

2. Pour chocolate and spread it out evenly over the bananas. Top with toasted almonds.

3. Chill thoroughly before cutting. Serve with whipped cream if you wish. Bon apetit! ^^

As usual, I couldn't wait to have anything chilled properly. And the caramel filling and chocolate was oozing out oh-so-lusciously.. I couldn't help licking my fingers ^^ This is seriously one of the most heavenly indulgences I've ever made!!! ^^ despite them looking sadly non-enticing nor exciting.. that's really all my fault, my bakes never made heads turn!


But let me assure you, this indulgent sweet definitely has marked a place in dessert-heaven! At least in ours, haha. Fatty hubby and piggies LOVE it ^^ Definitely one of my top 5, if not top 3 desserts! ^^


Wednesday, February 26, 2014

Super moist chocolate cake!

do not be deceived by how it looks ~ it's not dense nor fudgy like it looks!

This is an absolutely wonderful, moist, dark and rich chocolate cake! My kind of chocolate cake! ^^

I wish I have nicer pics to share, so you'd be convinced of the worthiness of this cake.. but as usual my skills are totally lacking and I'm afraid I've done a great injustice to this recipe ^^||.. Still, I hope you'd give this recipe a chance anyways.. it's really good and it's not dense as it looks in the pix!

Just so you know, I've always been finicky when it comes to chocolate cakes.. but this one, you just have to make it to believe it. In case you're still not convinced, this recipe uses BUTTER! Lots!!! ^^ ^^ ^^

Steamed super moist chocolate cake (recipe by Agnes Chang "Let's eat!", shared by my good friend, Bee Hong)
~ bake in an 8" square tin
220g sugar (it's perfect for me at 180g ^^) 
250ml milk
1 tsp instant coffee
250g unsalted butter (now we're talking! ^^ ^^ ^^)
3 eggs
135g plain flour
60g cocoa powder
3/4 tsp baking powder
1/2 tsp baking soda

1. Place sugar, milk and instant coffee in a saucepan and heat till sugar has dissolved. Remove from heat. Add butter and stir till melted. Leave to cool.

2. Fold in eggs one at a time into the cooled milk mixture.

3. Sift flours and cocoa powder together and mix into the egg mixture.

4. Pour into greased and lined 8" square baking tin and steam for 40 minutes on medium heat. That's the original recipe. But you can also do this ~ Bake in a preheated oven of 170C for 40-45 minutes, or till skewer comes out clean. ^^

Ok, you know me, I took the easy way and baked this in the oven ^^.. and it still turned out super-moist and heavenly! Lest you think this is a fluke (that's what I thought!), let me assure you, it is not! I've baked this twice, and it's just as gorgeous!

You can jazz it up and serve with a luscious chocolate frosting (melt chocolate with whipping cream) ~ which no piggy will be able to say no to! But me, I just love it as it is! ^^

It's rich and chocolatey-dark, but it's not at all cloying. It may look dense and fudgy like a brownie, but that's so deceiving 'cos it's really nicely rich yet light and airy textured ~ you can have many many seconds without feeling "uggghhh"! Best of all, it doesn't get stuck on the throat like some "saw-dust" cakes do!

I did say I'm finicky right?! Did I also mention I'm not big on chocolate cakes? It says a lot since I actually made this recipe twice ^^ And I'm going to again.. and again!

Well, I've found my chocolate cake! And it's so unbelievably easy!!! ^^


Friday, January 31, 2014

Caramel pineapple upside down cake ~ awesome-liciousss ^^


Two words ~ DECADENTLY AWESOME!!!

I had very much wanted to share this delish recipe the 1st time I made it late november last year! But the pictures.. ahhh.... never mind.

Since I knew I was going to make them again, I thought I would have better pics.. alas, the pics from the 2nd bake (a few weeks back) and the 3rd bake 2 nights ago was just as bad (oh why do I do this all the time and bake at nights????!!!!)! I give up, so please excuse my pics and get on with this fabulous recipe ^^

Caramel pineapple upside down cake (recipe adapted from simplyrecipes)
~ makes 2 8-inch round cakes
Caramel
2 scant cups brown/white sugar
1 cup / 227g unsalted butter, room temperature
1/3 cup / 80 ml heavy/whipping cream, room temperature
1 -2 tbsp rum
3 pinches of sea salt, add to own taste

2 big tins of pineapple rings, drained

Cake
227g unsalted butter
100g sugar
4 egg yolks
1 tsp rum, optional
200ml sour cream
240g flour, sifted
1 tsp baking powder, sifted
4 egg whites
60g sugar

1. Prepare caramel. Cook sugar, butter, cream and rum on medium heat. Do not stir. Bring to a boil and stir in sea salt, and remove from heat. Divide and pour into 2 greased 8-inch round baking tins, or 1*8-inch square tin and 2*8-inch loaf tins. If you encounter this problem where the caramel looks weird ie. caramel and oil separates, or maybe crystallized sugar.. it's ok. Get rid of crystallized sugar by straining the liquid. If you want a gorgeous caramel flavor and color (like I did), cook the sugar to a nice coppery-color (be careful, not black or burnt!), then add butter, cream, rum and sea salt.. read this.

2. Arrange pineapple rings in the baking tins filled with caramel.

3. In a bowl, beat butter and 100g sugar till light and fluffy (don't overbeat!) Add egg yolks one at a time and beat till well combined. Mix in rum..

3. Sift flour+baking powder, and fold into butter mixture in 3 batches. Mix in sour cream till combined. Batter should be nice and smooth now.

4. In a clean bowl, beat egg whites till frothy, and slowly add in 60g sugar. Beat till soft peaks are formed.

5. Fold in egg whites gently into cake mixture in 2 batches. Divide and pour mixture into the cake tins.

6. Bake in a preheated oven of 170C for 50-55 minutes, or till the skewer comes out clean. Remove and turn out cake onto a platter to cool. I love eating it straight from the fridge ^^

I first made this cake for big pig's 1920s whodunit-party. Pineapple upside down cake was the IT cake in the 1920s. And boy, did I receive rave reviews for it! Of course, "AWESOME" was one of them! ^^

Well, I personally find this ooey-gooey cake fabu-licious too! It's the decadent caramel, I swear!

THIS REALLY IS A SERIOUSLY AWESOME CAKE! JUST MAKE IT PRONTO! ^^ ^^ ^^

ong lai cake ~ wrapped up in gold ribbon for family & friends ^^ 

Gong Xi Fa Cai


Thursday, December 12, 2013

Cranberry n pistachio biscotti ^^


" No distance of place or lapse of time can lessen the friendship of those who are thoroughly persuaded of each other’s worth ~ Robert Southey "

Cranberry and pistachio biscotti (adapted from susan russo@npr.org)
~ makes about 22pcs (or 2 containers for 2 good friends ^^)
2 scant tsps baking powder
2 cups flour
3/4 scant cup sugar
1 cup pistachio, toasted
1 cup dried cranberries
3 medium eggs
1 tsp vanilla extract
zest of 1 orange
* extra beaten egg, for brushing

1. Sift baking powder and flour together. Mix in sugar, toasted pistachio and dried cranberries.

2. In another bowl, whisk eggs till well mixed. Add vanilla and orange zest, and mix till blended.

3. Add the egg mixture into the dry ingredients. Fold till well combined. 

4. Place batter on a lined baking tray. TIP: use a spoon to scoop batter onto tray and shape it like a log. Doesn't matter how long it is (or how many logs you make), just remember that it should be just 2 inches WIDE and 3/4-1 inch high! And remember to space the logs out as the batter will spread! Brush the logs all over with lightly beaten eggs.

5. Bake in a preheated oven of 170C for 35 - 40 minutes.

6. Remove from oven and cool for about 20 minutes before slicing into 3/4-inch thick slices, with a serrated kinfe.

7. Place slices back on baking tray and bake for 12 minutes. Turn biscotti over and bake for 8 minutes. Remove to cool.

** Biscotti tastes best after 2 days ~ it's true! ^^


It's wonderful to meet good friends again ^^. So what if we've been separated for a decade (and more! ^^).. chums will always be chums! 

Happiness is.. knowing nothing has changed.. ok, maybe the odd wrinkle or 2, haha! I missed you, friend! ^^


Sunday, October 27, 2013

Decadently luscious superlicious cinnamon rolls!!! ^^


Decadent. Luscious. Superlicious. NO-KNEAD! Yes, what are you waiting for???!!! ^^

Run straight into the kitchen or the baking supplies store, people!!! These are so so so so so soooooooo gooooooood! Of course, that's after reducing ALL the sugars by HALF! These cinnamon rolls by ree@thepioneerwoman are soooooooo delicious!!! Thanks so much, janine@unpastiche, for the recommendation! They are amazing!!! ^^

Pioneer Woman's Cinnamon Rolls (recipe from thepioneerwoman)
~ makes 27 rolls in 3 7-inch square trays
Dough
2 cups / 500 ml milk
1/2 cup / 125 ml vegetable oil
* 1/4 scant cup sugar
1 packet active dry yeast / 2 1/4 tsp instant yeast
4 cups all purpose flour (bread + all purpose is good ^^)
1/2 cup all purpose flour
1/2 tsp baking powder
1/2 scant tsp baking soda
1/2 tsp salt

Filling
1 cup (227g) melted butter
2 tbsp cinnamon powder
* 1/4 cup sugar (brown+white ^^)

1. Bring milk, oil and sugar to just short of a boil. Remove from heat and leave to cool for 45 minutes - 1 hour.

2. Add active dry yeast to lukewarm milk mixture and leave it to sit and bubble. Omit this step if using instant yeast.

3. If using instant yeast, blend in with the 4 cups of flour. Add flour into the milk mixture and mix till well combined. Cover and leave to double in size for about 1 hour.

4. Mix the extra 1/2 cup flour with baking powder and baking soda till well blended. Add the flours into the dough till well combined.

5. Refrigerate dough for later use or use immediately. Refrigerating overnight would be a good choice ^^

6. Generously flour working surface, and roll out dough thinly into a rectangle. Tip: Wrap rolling pin with plastic cling wrap.. you'll see! ^^

7. Spread melted butter all over dough. Sprinkle cinnamon powder and sugar all over evenly.

8. Roll dough from the long end towards you. Roll tightly and pinch the seams to seal.

9. Slice rolls into 3/4 or 1 inch thick and place them in greased baking tins. Leave to rise for 20-30 minutes.

10. Bake in preheated oven of 400F/200C till light golden brown for 15-20 minutes.

11. Remove and drizzle generously with sauce/topping of your choice! ^^


Easy caramel sauce (recipe from leitesculinaria)
~ make 1 1/2 cups
* 1/2 scant cup brown sugar
1 stick / 115g butter
1/4 cup heavy/whipping cream
1/4 cup honey
** add 2-3 pinches of sea salt ~ you won't regret this!

Bring all ingredients to a boil. Lower heat  and continue to stir and cook for 2 minutes. Drizzle over anything you fancy! ^^


I've sort of gotten the feel for rolling the dough after that one practise on italian cheese and herb pinwheels ^^ And these cinnamon rolls definitely benefitted from that maiden attempt, haha! ^^ 

Well, I must confess that I was a wee sceptical about the no-knead part, but these rolls turned out amazingly soft and fluffy inside. And the crust is nicely crisp and browned. So you can imagine how good it tastes with ooey-gooey sticky caramel sauce! ^^

Oh yes, because I reduce the sugars by half in the dough and filling, the rolls were just nicely sweet, not tooth achingly-sweet. As such it's totally perfect with caramel sauce or any frosting for that matter! ^^


I believe, like ree, I must be the most popular aunt and neighbour today! ^^


Saturday, October 26, 2013

A delicate castella cake ^^


Thanks, mel! I can't believe I made this.. and successfully too, at my first attempt! ^^

I had not planned on making castella cake ever, after reading the difficult steps and many failed- attempts stories. But after mel's text and encouragement to try it, because it tasted really good ^^.. and a re-look into the recipe that she used and also nami's of justonecookbook ^^.. as well as a "technical" discussion with her over whatsapp ^^, I decided to give it a go..

And lo and behold! A beautifully risen, soft and fluffily moist castella cake ~ a perfect cake.. almost, hehe! ^^

Castella cake (inspired by mel@melspantrykitchen, adapted from rotinrice and justonecookbook)
~ makes a small loaf
2 egg whites
70g sugar (MUST REDUCE to 35-40g next time!!!)
2 egg yolks
1.5 tbsp honey +1 tbsp water
60g bread flour (BREAD or HIGH PROTEIN flour only!), sift 2-3 times!

Glaze
1 tbsp + 1 tbsp water, dissolved


1. Using an electric mixer, whisk egg whites till foamy. Add sugar and beat till stiff and shiny, about 4 MINUTES.

2. Mix in egg yolks till combined.

3. Add honey+water and beat till well combined for 1 MINUTE.

4. Fold in flour gently into the batter using the mixer whisk or by hand using a WHISK.

5. GREASE (MUST! MUST! MUST!!!) baking tin, and line with paper (see here and here). This is important, so that cake doesn't cave in or shrink too much at the sides.

6. Gently pour cake mixture into lined baking tin. Remove bubbles by making a zig zag motion using a skewer, through the batter. Make sure to smooth the surface of the batter before putting it in the oven.

7. Bake in a preheated oven of 155-160C for about 40-45 minutes, or till golden brown, or till throughly baked.

8. Remove cake from baking tin and brush top with honey+water glaze. And immediately wrap it with plastic cling wrap. Place and leave cake overnight in the refrigerator.

9. Slice off and tidy up the sides before serving. Enjoy! ^^  


This cake turned out almost faultless ~ perfect texture, perfect rise, perfect moistness, perfect looks, perfect scent.. and perfect taste too.. if only it wasn't so sweet! I'm sure the sweetness level is pretty acceptable for most people, and if you're having it with green tea or unsugared tea or coffee. Maybe it's just us ~ too much of a sugar rush for us piggies! Even the king of sweet, baby pig commented that it's perfect but too sweet! ^^

i love instagram ^^

Anyway, this was still a very, very enjoyable treat ^^. Perfect with coffee! ^^


p.s. a pix of castella cake from Ginso, bought during our osaka trip last year. my first taste of "real" castella cake and it was just ok for us.. hence never attempted to make it since..that and the fact i still felt jinxed at making something resembling a chiffon cake, haha! ^^||


Tuesday, October 8, 2013

a boozy treat for big ^^


Big pig turned 17 yesterday. ^^

And his good aunt, that's me ^^ baked him a boozy cheesecake! In his favorite ice-cream flavor, rum n raisin ~ oh, yums!

Rum n raisin cheesecake (recipe adapted from Alex Goh's blueberry cheesecake recipe)
~ makes 12 cupcakes (easy share of happiness and fat! ^^) 

250g cream cheese
50g sugar
15g flour
2 egg yolks
200ml sour cream
2 egg whites
35g sugar
10g cornflour
150 - 200g raisins & sultanas, macerate for 5 days in lots of rum ^^

1. Prepare water bath and preheat oven to 150C.

2. Cream 50g sugar and cream cheese till light and fluffy.

3. Mix in flour till well combined.

4. Add in egg yolks, and beat till light and creamy.

5. Pour sour cream into cream cheese mixture and mix well. Do not over beat.

6. Fold in raisins till well combined.

7. In a separate bowl, whip egg whites and 35g sugar till stiff. Do not over beat. Gently fold in cornflour.

8. Mix in egg whites mixture to cream cheese mixture gently till well combined.

9. Line a 6 or 7" round cake tin or 12-cupcake tins. Fill up cake or cupcake cases till 3/4 or almost full.

10. Bake in water bath for 90 minutes for a whole cake, or 45-50 minutes if using cupcake/muffin tins. Leave cheesecake to cool in the oven with the door slightly ajar.

11. Refrigerate overnight. Serve with more rum-laced raisins, if you like ^^.

* Note: I reduced the quantity of flours from the original cheesecake recipe, hence my cheesecakes actually cracked, but they came together again when cooled.. Anyways, I have no problem with cracked tops ^^ I'd rather that than "floury-tasting" cheesecakes! ^^

I really like this cheesecake base recipe. Not only is it wonderful with blueberry, it's also totally yummy-licious with apple! And it rocks rum n raisin too! Soooooooo delish!!!!!!! I mean it! ^^

Big loves this cheesecake ^^ So do we! ^^ ^^ ^^

Thursday, August 8, 2013

Deliciousness ~ kuih akok ^^


I've been a bad girl! Not cooking nor baking for the past few weeks..

Well, I just couldn't resist all the deliciousness at the pasar ramadans! I've been having a whopping good time pasar ramadan hopping, checking and bingeing (of course! ^^) on all the yummies on offer! ^^ A whole month of bliss, aah...! ^^

Of course my happy run had to come to an end.. but there's the long weekend hols to look forward to ^^ Yay!

So to celebrate the first day of the long hols and to make up for lost time, I decided on a marathon cook and bake-out! ^^

Kuih Akok Kelantan (recipe from aziejaya, original from myresipi)
~ makes 12 pcs
5 eggs
200ml coconut milk (I like Kara coconut milk ^^)
100ml water
120g gula melaka, chopped roughly (I used gula melaka from Terengganu which comes in discs)
30g all purpose flour
3 pandan leaves, tear/cut into smaller pieces
a pinch of salt

1. In a pan, bring water, gula melaka and pandan leaves to a boil, or till gula melaka has dissolved. Remove from stove.

2. Add coconut milk to the gula melaka water.

3. When mixture is cooled, add eggs and flour. Mix well. Sieve mixture into a bowl/pouring jug.

4. Preheat oven at 200C and place WELL-OILED (more is necessary to ensure cakes doesn't stick to bottoms) muffin tin into oven as well.

5. Divide mixture and fill up muffin tins evenly. Bake for 20-25 minutes for a nicely browned kuih ^^.  


This is my current favorite malay kuih ~ I just love the browned/burnt crust and moist, pudding-like insides (note the holey, crumpled, ultra-soft texture in the pix above) ~ overtaking my all-time kuih bakar by a whisker ^^

I had to make this kuih because I missed out on it the last weekend at the pasar ramadan in tg lumpur when I was back home in kuantan. To appease my craving, I decided to have a go at this kuih during the hols. And believe me, this tastes as lusciously good as the stall-bought ones! ^^


They say the best akok is sold in Kelantan, so I guess a trip to Kota Bahru is in order. But till I get there, this recipe works just as well! ^^